Table of contents
- Introduction
- What is TypeScript?
- How to add TypeScript to your Next.js app
- How to use Typescript with Next.js data fetching methods
- How to use Typescript in Next.js API routes
- How to configure absolute imports and module path aliases in tsconfig.json
- Disabling Typescript Errors in Production
- Conclusion
- Build your React-based CRUD applications without constraints
Author: Michael Hungbo
Introduction
Next.js is an open source React framework for building single-page web applications. It comes with numerous out-of-the-box functionalities that make developing web applications faster and more interesting, thereby providing refined and elegant developer and user experiences.
Combining Next.js and TypeScript gives us superpowers to rapidly create applications with a good developer and user experiences. Every developer hates bugs. Especially pesky ones such as typos or trying to use or access undeclared variables. TypeScript helps catch these types of bugs early during development, and this is one of the many features that make integrating it with a tool like Next.js fantastic.
In this article, we'll look at how you can integrate TypeScript in your Next.js apps. We'll also explore reasons why you should consider using this tool in your Next.js projects and also talk about its benefits.
What is TypeScript?
It's a strict JavaScript superset used for large enterprise projects and writing programs that scale. In the end, TypeScript transpiles to plain JavaScript and can be used for developing applications on the client-side and server-side.
TypeScript is an object-oriented programming language that provides all JavaScript features and extra useful capabilities. These capabilities include static or dynamic type checking, error checking during compilation, type inference, and so on.
How to add TypeScript to your Next.js app
Next.js provides integrated support for TypeScript with built-in types for pages, API routes, the three data fetching methods, etc.
Basically, there are two ways in which we can add TypeScript to our project. The first is with create-next-app, and the second is by adding TypeSript manually to an existing project.
create-next-app
We can bootstrap a Next.js application with TypeScript by adding a --typescript or --ts flag to the create-next-app command like below:
npx create-next-app@latest --ts
# or
npx create-next-app@latest --typescript
Adding TypeScript to an existing project
Alternatively, we can also add TypeScript manually to an existing Next.js project.
First, you'll need to create a tsconfig.json file in your project root folder. This file specifies the root files and the compiler options required to compile the project and is populated automatically by Next.js with default values.
touch tsconfig.json
Next, run npm run dev or yarn dev (if you use Yarn) to start the application development server.
Next.js will emit a message in the terminal with the following content and try to install the necessary TypeScript related packages:
"It looks like you're trying to use TypeScript but do not have the required package(s) installed.
Installing dependencies

If you are not trying to use TypeScript, please remove the tsconfig.json file from your package root (and any TypeScript files in your pages directory)."


Installing devDependencies (yarn):
- typescript
- @types/react
- @types/node

[1/4] Resolving packages...
[2/4] Fetching packages...
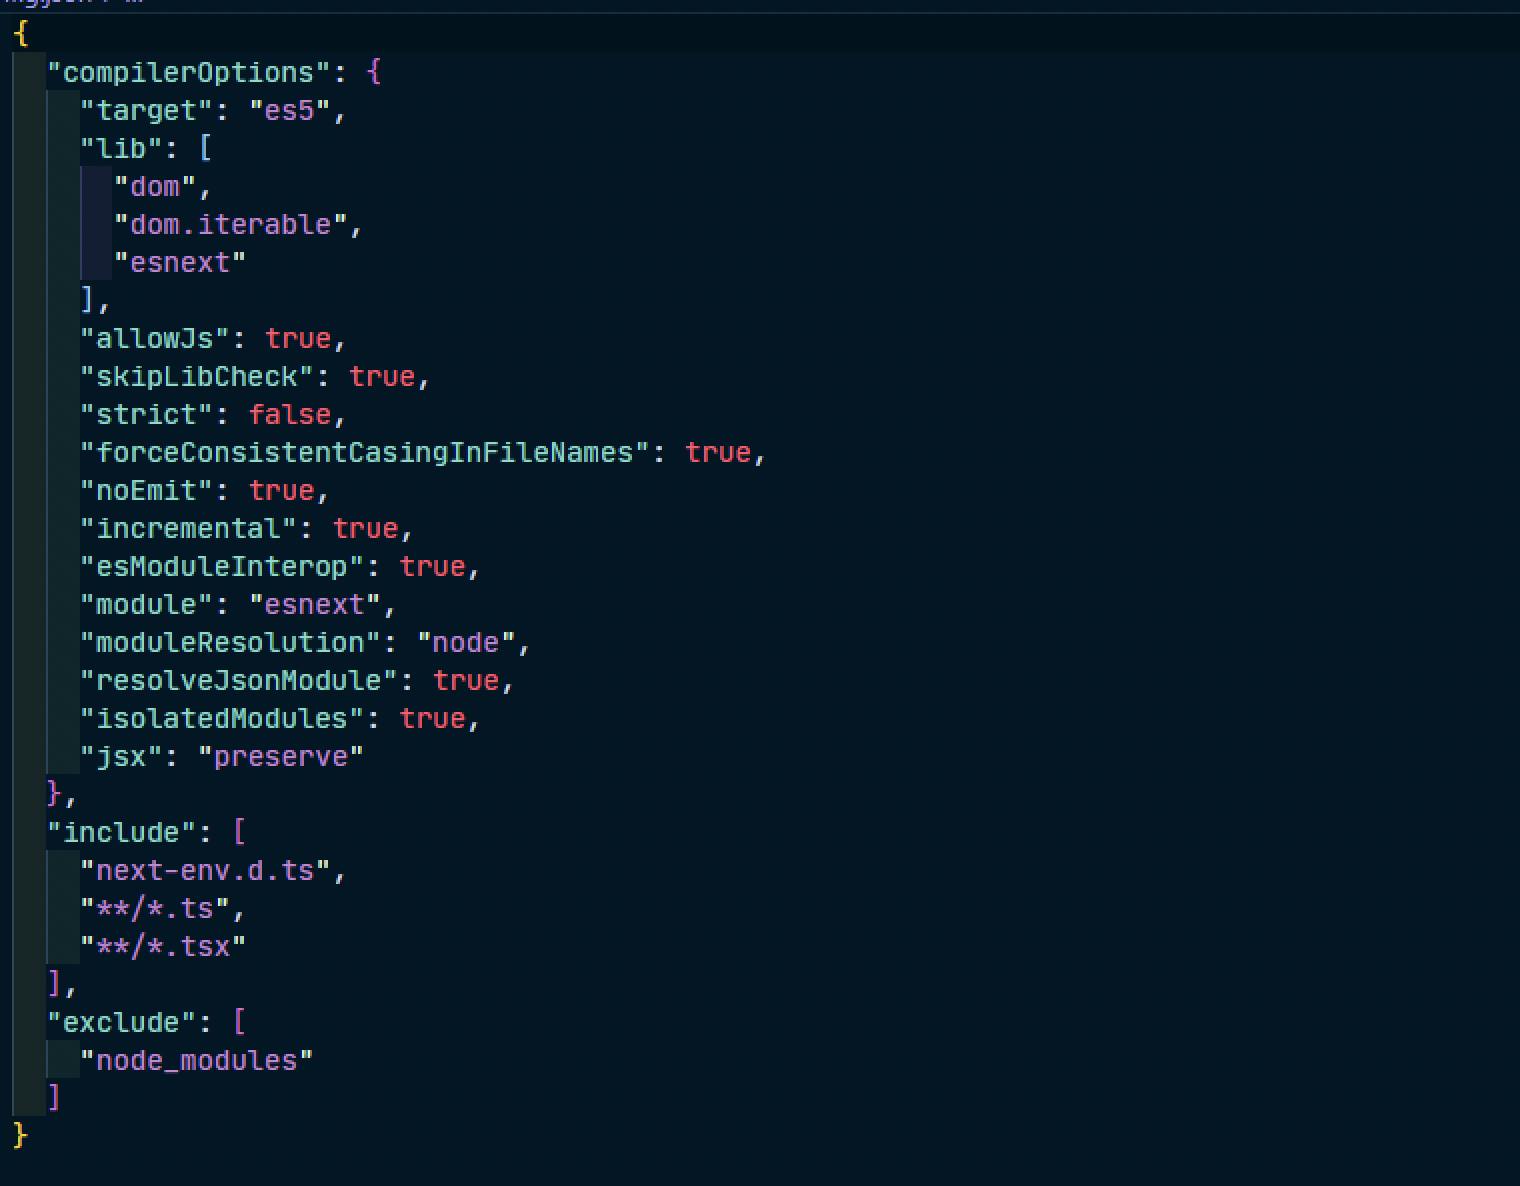
When the installation is complete, open tsconfig.json and you'll see it populated with values like below:

If you noticed, Next.js also created a new file, next-env.d.ts in the project root. This file ensures Next.js types are picked up by the compiler and should not be edited or deleted. Also, ensure the file is added to .gitignore to prevent it from being committed by version control like Git.
With this, you can now start creating files with .ts and .tsx extensions in your application.
Usage example
import React from 'react'

type ProfileProps = {
    profile: {
    firstName: string,
    lastName: string,
    age: number,
    }
}

const Profile: React.FunctionComponent<ProfileProps> = ({ profile }): JSX.Element => {
    return (
        <>
          <p>Profile</p>
          <div>Welcome, {profile.firstName}</div>
        </>
    )
}

export default Profile;
How to use Typescript with Next.js data fetching methods
Next.js comes with built-in types for all its three data fetching methods (getStaticProps, getServerSideProps, and getStaticPaths).
Here's how to use them in your code:
import { GetStaticProps, GetStaticPaths, GetServerSideProps } from 'next'

export const getStaticProps: GetStaticProps = async (context) => {}

export const getStaticPaths: GetStaticPaths = async () => {}

export const getServerSideProps: GetServerSideProps = async (context) => {}
Next.js also provides built-in types to infer the types for props from getServerSideProps and getStaticProps.
If you want to get inferred typings for your props, you can use InferGetStaticPropsType<typeof getStaticProps> or InferGetServerSidePropsType<typeof getServerSideProps> in a page component.
Let's say we're expecting some data from an API that we need to pre-render at build time. Instead of writing repetitive code like the below:
// index.tsx

type PostProps= {
    userId: number,
    id: number,
    title: string,
    body: string
  }

export const getStaticProps = async () => {
      const response = await fetch('https://jsonplaceholder.typicode.com/posts');
      const posts: PostProps[] = await response.json();

    return {
      props: {
        posts,
      },
    }
  }

function PostPage({ posts }: { posts: PostProps }) {
    ...
  }

export default PostPage;
We can use InferGetStaticPropsType to get inferred typings for the posts prop. Add and refactor the code with the highlighted like below:
// index.tsx

// ==>
import { InferGetStaticPropsType } from 'next'
// <==

...

 // ==>
function PostPage({ posts }: InferGetStaticPropsType<typeof getStaticProps>) {}
// <==

export default PostPage
You can also use this same method when using getServerSideProps.
How to use Typescript in Next.js API routes
Next.js also comes with built-in types for API routes. which we can access like below:
import type { NextApiRequest, NextApiResponse } from 'next'

export default (req: NextApiRequest, res: NextApiResponse) => {
  res.status(200).json({ age: '25' })
}
We can also specify custom types for the response data:
import type { NextApiRequest, NextApiResponse } from 'next'

type Data = {
  name: string
}

export default (req: NextApiRequest, res: NextApiResponse<Data>) => {
  res.status(200).json({ age: '25' })
}
How to configure absolute imports and module path aliases in tsconfig.json
Do you relate with the pain of having to do something like this?
Import { fetchUserProfile } from '../../../../utils'
Import UserProfile from '../../../UserProfile'
How about if you could do something like?
Import { fetchUserProfile } from '/@utils'
Import UserProfile from '@components/UserProfile'
Well, to achieve this, we can configure path aliases in tsconfig.json so we can conveniently import modules across our application. TypeScript path aliases allow us to create aliases or shortcuts for absolute paths in the application, which we can resolve to. Next.js also automatically supports path aliases, so we don't have to do many configurations.
For example, if you have a file in your project importing a module with a path structure like /components/MUIComponents/ButtonGroup/, instead of trying to write an ugly code such as this:
import React from "react";
import ButtonGroup from import ButtonGroup from "../../components/MUIComponents/ButtonGroup";

const User = () => {
  return (
    <>
      <h1>User Page</h1>
      <div>
        <ButtonGroup />
      </div>
    </>
  );
};

export default User;
We can create a path alias for all files in the MUIComponents folder for easy access using the baseUrl and path options in tsconfig.json like so:
...
"baseUrl": ".",
"paths": {
    "@/MUIComponents/*": ["components/MUIComponents/*"]
},
...
baseUrl lets us specify a root URL to use for our imports and paths lets us configure path aliases. You can read more about module path aliases here.
Note:
You can use a jsconfig.json file instead if you're not using TypeScript in your project.
Now we can use the alias in our application like so:
import ButtonGroup from "@/MUIComponents/ButtonGroup";

const User = () => {
  return (
    <>
      <h1>User Page</h1>
      <div>
        <ButtonGroup />
      </div>
    </>
  );
};

export default User;
This looks way better and straightforward.
Disabling Typescript Errors in Production
If you happen to have TypeScript errors while running next build, Next.js will fail the build but you can disable the type checks if you wish.
To disable the type checking step, enable the ignoreBuildErrors option in next.config.js like so:
// next.config.js"

module.exports = {
  typescript: {
    // !! WARN !!
    // Dangerously allow production builds to successfully complete even if
    // your project has type errors.
    // !! WARN !!
    ignoreBuildErrors: true,
  },
}
Note: Make sure you really know what you're doing before using this option. :::
Conclusion
We covered how to get started with TypeScript in your Next.js applications. We also talked about the importance and benefits associated with combining TypeScript capabilities with Next.js for a faster and easier application development experience. We hope this article helps you consider integrating TypeScript and Next.js in your next applications.
Author: Michael Hungbo
Build your React-based CRUD applications without constraints
Low-code React frameworks are great for gaining development speed but they often fall short of flexibility if you need extensive styling and customization for your project.
Check out refine,if you are interested in a headless framework you can use with any custom design or UI-Kit for 100% control over styling.
refine is an open-source React-based framework for building CRUD applications without constraints. It can speed up your development time up to 3X without compromising freedom on styling, customization and project workflow.
refine is headless by design and it connects 30+ backend services out-of-the-box including custom REST and GraphQL API’s.
Visit refine GitHub repository for more information, demos, tutorials, and example projects.


