


Author: David Omotayo
Introduction
Forms are an essential part of web development; they serve as an avenue for proprietors to form formal relationships with their users. However, due to the complexity of some forms, they can come off as intrusive and affects user experience.
Dynamic forms are forms with metadata templates that describe their field’s object model, which can be used to generate new fields automatically. With dynamic forms, proprietors can solve the user experience issue referenced earlier by allowing users to append and remove fields according to their needs.
In this article, we’ll look at how to use React hook form and refine to build a dynamic form in React.
Prerequisite
To follow along with this tutorial, you need to have a fundamental knowledge of Typescript and the following:
Node.js installed on your machine
Basic understanding of React hook form
Basic knowledge of Material UI and refine project structure.
What is refine
refine is an open-source UI framework for building enterprise applications such as dashboards, admin panels, and internal tools.
refine is a headless framework, meaning it doesn't ship with any pre-styled components or UI by default. It integrates well with any custom designs or UI libraries, such as Ant design, Mantine, and Material design, giving you complete control over the composition of your application UI.
Here are some of the benefits of using refine:
No constraints on styling
Backend agnostic: refine supports any custom Rest or Graphql API out of the box
Open source: refine has a strong community of maintainers and contributors.
Workflow independence: refine prevents vendors lock-in, thus giving you and your team complete control over your project.
Refer to the documentation to learn more about refine.
What is React hook form
React hook form is a lightweight package for handling form validations in React. It provides an easy-to-use API that lets us implement functionalities such as error handling and submission with minimal code.
React hook form adopts the approach of isolating re-renders in components by using uncontrolled inputs with React's ref hook, instead of the conventional way of depending on states to control inputs.
refine project setup
There are two possible ways to set up a refine project: manually or using superplate. Superplate is a CLI tool for bootstrapping a Typescript React project with refine integrated out of the box. The tool offers the option to set up a headless refine project or a project with third-party UI libraries such as Ant design and Material UI.
We'll use create refine-app to set up a refine project with Material UI. It’ll save us the trouble of setting it up from scratch.
As a first step, navigate to a preferred folder on your computer and run the command below to initialise CLI installer:
npm create refine-app@latest dynamic-form-example
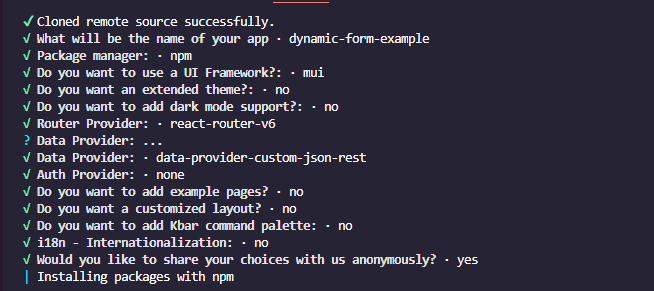
The installer will prompt you to select your preference for the project. Select the following options to proceed:
Next, cd into the newly created folder and run the following command to install React hook form extension package for refine:
cd dynamic-form-example
npm i @pankod/refine-react-hook-form
This package will let us access React hook form's perks in refine.
Once the installation is done, run the following command to start the development server:
npm run dev
If your default browser doesn't automatically open the app after starting the server, open your browser and navigate to localhost:8000 to view the app.

Creating the List, Create, and Edit pages
For this project, we'll build a refine app with CRUD pages that handle functionalities for listing, creating, and editing records from a fake API endpoint. And as a first step, we'll create these pages and pass them to the list, create, and edit properties on the <Refine> component's resources prop. We'll also handle dynamic forms using React hook form.
To begin with, create a pages folder inside the src folder and add a userList, userCreate, and userEdit files:
Next, import the Create, List , and Edit components from refine into their respective files and declare them in the body of the components.
//src/pages/UserCreate

import { Create } from "@pankod/refine-mui";

function UserCreate() {
  return <Create></Create>;
}
export default UserCreate;
These components provide a layout to display the List, Create, and Edit pages. They do not contain any logic, but they add action buttons like the Create and save buttons on the list and create pages.
Now, open the App.jsx file, import each file and add them to the resources prop like so:
// src/App.tsx

import React from "react";
import { Refine } from "@pankod/refine-core";
import {
  notificationProvider,
  RefineSnackbarProvider,
  CssBaseline,
  GlobalStyles,
  Layout,
  ThemeProvider,
  LightTheme,
  ReadyPage,
  ErrorComponent,
} from "@pankod/refine-mui";

import UserCreate from "pages/userCreate";
import UserEdit from "pages/userEdit";
import UserList from "pages/userList";

import routerProvider from "@pankod/refine-react-router-v6";
import dataProvider from "@pankod/refine-simple-rest";

function App() {
  return (
    <ThemeProvider theme={LightTheme}>
      <CssBaseline />
      <GlobalStyles styles={{ html: { WebkitFontSmoothing: "auto" } }} />
      <RefineSnackbarProvider>
        <Refine
          notificationProvider={notificationProvider}
          Layout={Layout}
          ReadyPage={ReadyPage}
          catchAll={<ErrorComponent />}
          routerProvider={routerProvider}
          dataProvider={dataProvider("https://api.fake-rest.refine.dev")}
          resources={[
            {
              name: "users",
              list: UserList,
              create: UserCreate,
              edit: UserEdit,
            },
          ]}
        />
      </RefineSnackbarProvider>
    </ThemeProvider>
  );
}<>

export default App;
Notice the link being passed to the <Refine>'s dataProvider prop. This is the mock API endpoint we'll be fetching and posting data using our form.
Refer to the documentation to learn more about the resources and dataProvider properties.
Listing Records
With the setup out of the way, we can populate the List page with data from the API using MUI’s <DataGrid> component before we delve into the form creation process.
<DataGrid> is a component for rendering tabular data in React. The component comes with several features out of the box, with the prominent ones being automatic pagination, sorting, and filtering.
The <DataGrid> component accepts two major props:
row: this prop accepts an array of objects to be rendered within the table rows.column: this prop also accepts an array of objects, but for mapping and formatting fields shown on the table.
We’ll look at how to use these props later in this section. For now, return to the UserList file and import the <DataGrid> component and the following components:
// src/pages/UserList.tsx

import React from "react";
import { useDataGrid, DataGrid, List } from "@pankod/refine-mui";
useDataGrid is a refine hook that fetches data from the API and wraps them with various helper hooks required for MUI components, such as the <DataGrid> component to render data.
Next, add the following code before the return statement inside the UserList function:
// src/pages/UserList.tsx

const { dataGridProps } = useDataGrid<IPost>();

const columns = React.useMemo<GridColumns<IPost>>(
  () => [
    { field: "firstName", headerName: "First Name", flex: 1, minWidth: 250 },
    {
      field: "email",
      headerName: "Email",
      minWidth: 220,
      flex: 1,
    },
    {
      field: "skills",
      headerName: "Skills",
      minWidth: 220,
      flex: 1,
    },
  ],
  []
);
Here, we destructured the dataGridProps property from the useDataGrid hook and created a columns array of objects.
Using the columns array, the <DataGrid> component will create a header for every object in the array. The field property maps each header to a matching key from the API response, while the headerName property sets the header's name on the table.
Finally, declare the <DataGrid> component within the List component and add the following props:
// src/pages/UserList.tsx
...

return (
<List>
<DataGrid {...dataGridProps} columns={columns} autoHeight />
</List>
);
Notice that we only pass the columns prop to the <DataGrid> component. This is because the dataGridProps property automatically injects the rows prop and its values into the component.
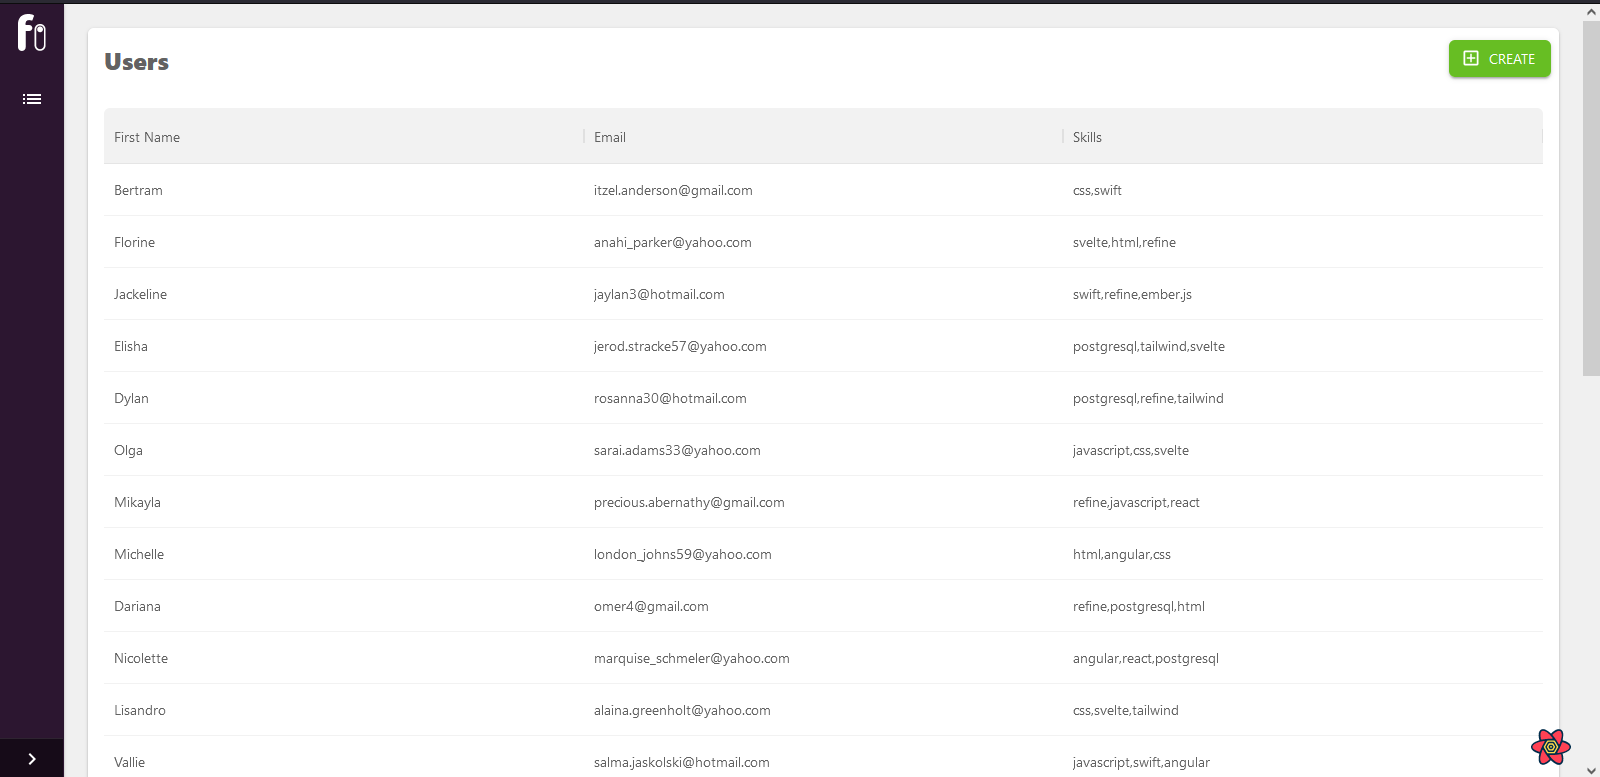
Now save your progress and return to the browser; you should see a rendered table with the response data from our API.
Next, we’ll compose the dynamic form for creating and posting records to the mock API endpoint.
Creating a form
As a first step, navigate to the UserCreate file and import the following components from refine and React hook form:
// src/pages/UserCreate.tsx

import { Create, Box, TextField, Button } from "@pankod/refine-mui";
import {
  useForm,
  Controller,
  useFieldArray,
} from "@pankod/refine-react-hook-form";
Next, destructure the saveButtonProps variable from the useForm hook and add it to the Create component:
// src/pages/UserCreate.tsx

const { saveButtonProps } = useForm();

function UserCreate() {
  return <Create saveButtonProps={saveButtonProps}></Create>;
}
export default UserCreate;
This will make the save button on the Create page functional. When clicked, it'll handle the post request for the record inputted on the form.
This is the beauty of using refine; we don't have to concoct complex logic for tasks such as this. refine does all the heavy lifting.
Moving on, create a barebone form composition using Material UI's Box and TextField components inside the Create component tags like so:
// src/pages/UserCreate.tsx

<Box>
  <>
    <TextField />
    <TextField />
  </>
</Box>
If you go to the browser after saving your progress and route to the create page, you should see a simple form similar to what's shown in the image below rendered on the page.

Right now, the form lacks the functionality of an actual form. To make it functional, we'll wrap it with React hook form's controller component and add the necessary props.
Using the controller component
The Controller component is a wrapper for controlled inputs. It lets us register controlled input components from external UI libraries such as MUI and Ant design to React hook form.
The Controller component accepts three major props:
name: Unique string value of the input's name.control: Invokes thecontrolproperty from the useForm hook.render: A function that returns a component that will be controlled by React hook form.
To use the controller component, we must first create a deafultValue object, type interface and destructure the control and other necessary properties from the useForm hook:
// src/pages/UserCreate.tsx

interface IPost {
firstName: string;
email: string;
skills: string;
}

const defaultValues = {
firstName: "",
email: "",
skills: "",
};

function UserCreate() {
const {
saveButtonProps,
control,
formState: { errors },
} = useForm<IPost>({
mode: "onChange",
defaultValues,
});
The defaultValue object properties will serve as our input field's default value. The mode property we’re passing alongside the defaultValue object to the useForm hook specifies how React hook form should check for changes in each field.
Next, we declare the Controller component on our form and move the TextField components within its render prop function:
// src/pages/UserCreate.tsx

<Controller
    control={control}
    name="firstName"
    render={({ field }) => (
        <TextField
        {...field}
        error={!!errors?.firstName}
        helperText={errors.firstName && `${errors.firstName.message}`}
        margin="normal"
        required
        fullWidth
        id="firstName"
        label="First Name"
        autoFocus
        />
    )}
/>
<Controller
    control={control}
    name="email"
    render={({ field }) => (
        <TextField
        {...field}
        error={!!errors?.email}
        helperText={errors.email && `${errors.email.message}`}
        margin="normal"
        required
        fullWidth
        id="email"
        label="Email"
        />
    )}
/>
In the code above, we added the control and name props to the controller component and then passed the control property from the useForm hook and a unique name to them as arguments.
Notice the properties on the TextField components:
// src/pages/UserCreate.tsx

<TextField
  {...field}
  error={!!errors?.firstName}
  helperText={errors.firstName && `${errors.firstName.message}`}
  margin="normal"
  required
  fullWidth
  id="firstName"
  label="First Name"
  autoFocus
/>
We're using the required, error, and helperText props to add basic validation to each field and pass the Controller's properties to them via the field parameter.
Now our input fields are registered to React hook form. We can add dynamic fields using React hook form's useFieldArray hook.
Using the usefieldsArray hook.
The useFieldArray hook is a custom function for working with field arrays. It exposes a field property that returns a dynamic array of fields alongside methods for appending, removing, and prepending fields from the array.
In this section, we'll iterate through the fields array and append a TextField each time a button is clicked.
To begin with, call the useFieldArray hook right below the useForm declaration and destructure the append and remove methods from the hook.
// src/pages/UserCreate.tsx

const { fields, append, remove } = useFieldArray();
Next, add an object with control and name keys to the hook as an argument and then pass the control property from the useForm hook and a unique name, in our case: "skills", to the control and name keys, respectively.
// src/pages/UserCreate.tsx

const { fields, append, remove } = useFieldArray({
  control,
  name: "skills",
});
Lastly, add the following codes below the TextFields on the form:
// src/pages/UserCreate.tsx

{
  fields.map(({ id }, index) => {
    return (
      <Box key={id} sx={{ display: "inline-flex" }}>
        <Controller
          control={control}
          name={`skills[${index}].skills`}
          render={({ field }) => (
            <TextField
              {...field}
              error={!!errors?.skills}
              helperText={errors.skills && `${errors.skills.message}`}
              margin="normal"
              required
              fullWidth
              id="skills"
              label={`Skill - ${index + 1}`}
            />
          )}
        />
      </Box>
    );
  });
}
Here, we iterated over the field property's dynamic arrays using the map method and returned a new TextField component inside the callback function.
We added two parameters to the callback function: field and index. The field parameter represents each dynamic field and can be used to get their unique identifiers: id and other properties. On the other hand, the' index' parameter is used to get the position of each field on the array.
As you can see in the code block above, we're using both parameters to pass arguments to the key and label props on the TextField component.
We cant use our dynamic fields just yet; we need a way to trigger it on command. Next, we'll use the useFieldArray action methods to append and remove dynamic fields on the form.
Is your CRUD app overloaded with technical debt?
Meet the headless, React-based solution to build sleek CRUD applications. With refine, you can be confident that your codebase will always stay clean and future-proof.
Try refine to rapidly build your next CRUD project, whether it's an admin panel, dashboard, internal tool or storefront.

Using useFieldArray actions.
useFieldArray actions are methods that let us add and delete dynamic fields in a form. They are relatively easy to implement; all we have to do is call them in an event handler to use them.
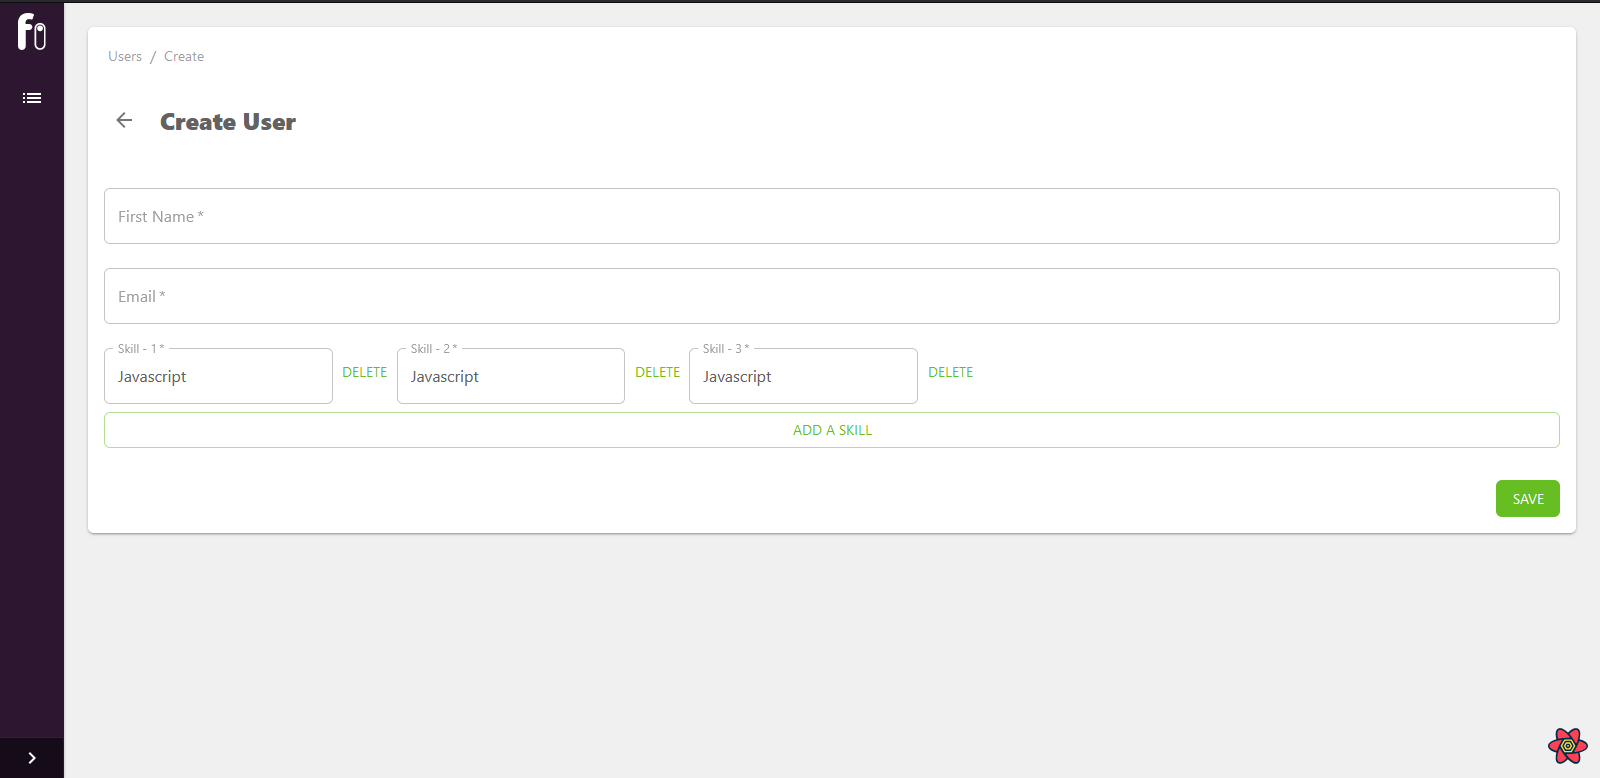
In this section, we'll add a button component with an onClick event handler to the form and call the append method inside.
To do this, add the Button component to the list of imported components at the top of the page like so:
import { Create, Box, TextField, Button } from "@pankod/refine-mui";
Next, declare the button component with an event handler below the dynamic fields and call the append() method inside it:
// src/pages/UserCreate.tsx

{
  fields.map(({ id }, index) => {
    return (
      <Box key={id} sx={{ display: "inline-flex" }}>
        <Controller
          control={control}
          name={`skills[${index}].skills`}
          render={({ field }) => (
            <TextField
              {...field}
              error={!!errors?.skills}
              helperText={errors.skills && `${errors.skills.message}`}
              margin="normal"
              required
              fullWidth
              id="skills"
              label={`Skill - ${index + 1}`}
            />
          )}
        />
      </Box>
    );
  });
}
<Button
  variant="outlined"
  fullWidth
  onClick={() => {
    append({ skills: "Javascript" });
  }}
>
  Add a skill
</Button>;
Note: The object argument being passed to the
appendmethod will serve as the default value of each dynamic field.
That's all it takes to use useFieldArray actions in a form. If you save your progress and return to the browser, you should be able to perform the actions shown in the gif below:
Handling submission
As you might have noticed in the previous section, our dynamic field values are not properly being sent to the API.

This is because the useFieldArray returns an array of objects with each field value instead of string values.

When handling the form's submission, refine automatically grabs the expected value from each input field and sends it to the server. The fullName and email records expect a string value, while the skills record expects an array of strings.
Since the useFieldArray hook also returns an array, but with objects, refine assumes the data is what's expected and sends it to the server.
As mentioned earlier, the <Create>, <Edit>, and <List> components are layouts for displaying the Create, Edit, and List pages, and they each contain action buttons, such as the save button on the Create and Edit pages and the Create button on the List page.
These buttons use underlying functions to perform specific actions on their located pages. The Create button routes users to the Create page when clicked, while the Save button handles the submission functionality of the form under the hood.
Fortunately for us, refine provides an onFinish hook that lets us override the save button's default configuration and define what’s sent to the server. The hook accepts an object with properties of each record on the API, to which we can pass custom values:
    onFinish({
      firstName: “”,
      email: “”,
      skills: “”,
    });
To use this hook, first, destructure it and the handleSubmit hook from useForm.
// src/pages/userCreate.tsx
const {
  refineCore: { onFinish },
  control,
  formState: { errors },
  handleSubmit,
} = useForm<IPost>({
  mode: "onChange",
  defaultValues,
});
Next, create a submitHandler function and add a saveButtonProps prop to the Create component’s opening tag with the following code:
// src/pages/userCreate.tsx

function UserCreate() {
  ...
 const submitHandler = (values: any) => {
    let fieldValue: string[] = [];
    values.skills.forEach((val: any) => {
      fieldValue.push(val.skills);
    });

    onFinish({
      firstName: values.firstName,
      email: values.email,
      skills: fieldValue,
    });
  };

  return (
    <Create saveButtonProps={{ onClick: handleSubmit(submitHandler) }}>
    ...
    </Create>
  );
}

export default UserCreate;
Inside the submitHandler function, we’re grabbing the skills values from the returned array of objects and pushing them to a new array, which is also being passed to the skills property on the onFinish object.
Conventionally, the saveButtonProps prop accepts a saveButtonProps variable from the useForm hook that handles the submission functionality when the save button is clicked. But since we’re using a custom function for our form’s submission, we passed an object with an onClick property to it instead.
// src/pages/userCreate.tsx

saveButtonProps={{ onClick: handleSubmit(submitHandler) }}>
The object accepts an event listener key and a function value. It overrides the save button’s default setting and makes it run the function being passed as the value, in this case, the submitHandler function, whenever the event fires.
handleSubmit is a React hook form function for managing form submission events. It receives the form's data if the form validation is successful and passes it to the submitHandler function.
Refer to the documentation to learn more about the onFinish hook and the saveButtonProps prop.
Now, if you save your progress and go back to the browser, everything should work as expected.
Notice we can add fields but can't remove them. Next, we'll look at how we can use the remove action property to delete fields on the form.
Removing fields
The remove method lets us remove dynamic fields at a specific position. it removes the field whose index has been passed to it as an argument or every dynamic field on the form when no index is provided.
// src/pages/UserCreate.tsx
remove(index);
To use this method, we'll add a button inside the callback function, below the TextField component, and call it inside an onClick handler, with the index parameter passed to it.
// src/pages/UserCreate.tsx

<Button
  onClick={() => {
    remove(index);
  }}
>
  delete
</Button>
That's it. Now we can remove appended fields by clicking the delete button rendered alongside them.
To align the fields and delete buttons horizontally on the same axis, we can wrap the TextField and Button components with a Box component and make it a Flex container like so:
// src/pages/UserCreate.tsx

<Box key={id} sx={{ display: "inline-flex" }}>
  <Controller
    control={control}
    name={`skills[${index}].skills`}
    render={({ field }) => (
      <TextField
        {...field}
        error={!!errors?.skills}
        helperText={errors.skills && `${errors.skills.message}`}
        margin="normal"
        required
        fullWidth
        id="skills"
        label={`Skill - ${index + 1}`}
      />
    )}
  />
  <Button
    onClick={() => {
      remove(index);
    }}
  >
    delete
  </Button>
</Box>
The Box component will create a Flexbox context around both components and align them side-by-side on the y-axis.
Alternatively, we can use a MUI bin icon instead of a button. This will give the form a better aesthetical feel.
To do this, import the DeleteIcon icon component from MUI like so:
// src/pages/UserCreate.tsx
import DeleteIcon from "@mui/icons-material/Delete";
Then remove the delete button and add the icon in its place:
// src/pages/UserCreate.tsx

<Box
  key={id}
  sx={{
    display: "inline-flex",
    alignItems: "center",
    marginRight: "15px",
  }}
>
  <Controller
    control={control}
    name={`skills[${index}].skills`}
    render={({ field }) => (
      <TextField
        {...field}
        error={!!errors?.skills}
        helperText={errors.skills && `${errors.skills.message}`}
        margin="normal"
        required
        fullWidth
        id="skills"
        label={`Skill - ${index + 1}`}
      />
    )}
  />
  <DeleteIcon
    onClick={() => {
      remove(index);
    }}
    sx={{ color: "red", cursor: "pointer" }}
  />
</Box>

Validation
We can add validation that prevents users from submitting the form without appending at least a field. To do this, we'll add a rules property to the useFieldArray object argument and give it a required property and the error message as its value.
// src/pages/UserCreate.tsx

const { fields, append, remove } = useFieldArray({
  control,
  name: "skills",
  rules: {
    required: "please add at least one skill",
  },
});
Now, if you try to submit the form without appending at least one field, you'll get the error message we're passing to the required property above.
The form composition is complete. Next, we'll look at how to set up the Edit page for updating records.
Creating the Edit page
To properly edit records inside the <Edit> page, we need an identical composition of the <Create> page's form. But instead of creating a new one from scratch, we can simply add a duplicate of the former inside the <Edit> page and make necessary changes like so:
// src/pages/UserEdit.tsx

import React from "react";
import { Edit, Box, TextField, Button } from "@pankod/refine-mui";
import {
  useForm,
  Controller,
  useFieldArray,
} from "@pankod/refine-react-hook-form";

interface IPost {
  firstName: string;
  email: string;
  skills: string;
}

const defaultValues = {
  firstName: "",
  email: "",
  skills: "",
};

function UserEdit(Props: any) {
  const {
    saveButtonProps,
    control,
    formState: { errors },
    handleSubmit,
  } = useForm<IPost>({
    mode: "onChange",
    defaultValues,
  });

  const { fields, append, remove } = useFieldArray({
    control,
    name: "skills",
    rules: {
      required: "please add at least one skill",
    },
  });

  return (
    <Edit saveButtonProps={saveButtonProps}>
      <Box component="form">
        <>
          <Controller
            control={control}
            name="firstName"
            render={({ field }) => (
              <TextField
                {...field}
                error={!!errors?.firstName}
                helperText={errors.firstName && `${errors.firstName.message}`}
                margin="normal"
                required
                fullWidth
                id="firstName"
                label="First Name"
                autoFocus
              />
            )}
          />

          <Controller
            control={control}
            name="email"
            render={({ field }) => (
              <TextField
                {...field}
                error={!!errors?.email}
                helperText={errors.email && `${errors.email.message}`}
                margin="normal"
                required
                fullWidth
                id="email"
                label="Email"
              />
            )}
          />
          {fields.map(({ id }, index) => {
            return (
              <Box
                key={id}
                sx={{
                  display: "inline-flex",
                  alignItems: "center",
                  marginRight: "15px",
                }}
              >
                <Controller
                  control={control}
                  name={`skills[${index}]`}
                  render={({ field }) => (
                    <TextField
                      {...field}
                      error={!!errors?.skills}
                      helperText={errors.skills && `${errors.skills.message}`}
                      margin="normal"
                      required
                      fullWidth
                      id="skills"
                      label={`Skill - ${index + 1}`}
                    />
                  )}
                />
                <DeleteIcon
                  onClick={() => {
                    remove(index);
                  }}
                  sx={{ color: "red", cursor: "pointer" }}
                />
              </Box>
            );
          })}
        </>
      </Box>
      <p>{errors.skills && `${errors.skills?.root?.message}`}</p>
      <Button
        variant="outlined"
        fullWidth
        onClick={() => {
          append({ skills: "Javascript" });
        }}
      >
        Add a skill
      </Button>
    </Edit>
  );
}

export default UserEdit;
Unlike the UserCreate page, we don’t have to create a manual functionality for submitting the form. This is because the API returns an array for the skills record by default, so refine won’t have trouble accessing the array and updating records as expected.
As a result, we removed the submitHandler function and passed the saveButtonProps variable from useForm to the <Edit> component’s opening tag:
// src/pages/UserEdit.tsx

<Edit saveButtonProps={saveButtonProps}>...</Edit>
This is all we have to do to set up the edit page. However, for the page to be accessible, we need to create a functionality for redirecting users to the <Edit> page of specific records.
We'll do this by adding an action column to the table on the List page and an edit button for each row. When clicked on, the edit button will redirect users to the edit page of the corresponding record on its row.
First, return to the UserList file and import the EditButton components from refine:
// src/pages/UserList.tsx

import {
  useDataGrid,
  DataGrid,
  GridColumns,
  List,
  Stack,
  EditButton,
} from "@pankod/refine-mui";
The EditButton component uses refine’s useNavigation hook under the hood to redirect users to the edit page of resources.
Refer to the documentation to learn more about the useNavigation hook.
Next, add a fourth object to the columns array with the following properties:
// src/pages/UserList.tsx

...
{
  headerName: "Actions",
  headerAlign: "center",
  field: "actions",
  minWidth: 180,
  align: "center",
  flex: 1,
  sortable: false,
  renderCell: function render({ row }: { row: any }) {
    return (
    <Stack direction="row" spacing={1}>
    <EditButton size="small" hideText recordItemId={row.id} />
    </Stack>
    );
  },
},
...
Here, we added a renderCell property to the fourth object and passed it a function that renders the EditButton to each row on the table. Then we used the row parameter on the function to get the id of the records and passed them to the recordItemId prop on the EditButton.
This way, when the edit icon is clicked, refine will know to redirect users to the Edit page of the corresponding record on the same row as the icon.
That’s it. We’ve successfully composed a fully functional dynamic form that posts and updates records from an API endpoint.

Conclusion
In this article, we introduced refine and React hook forms and looked at their benefits. Then walked through the process of setting up a refine project with Material design and how to handle CRUD functionalities using the List, Create, and Edit pages.
We also looked at how to set up a dynamic form using React hook form’s useFieldArray hook and how to fix the quirks that come with using the tool.